Thursday, July 30, 2020

Pandan Chiffon Cake

I had tried few recipe before but turned out not so good. A friend of mine gave me 2 'aluminium mold' medium size ... so trying out with this recipe that i found from youtube... Apron, a very good channel for simple and easy instructions, which turned up to be the best trial I had before.

p/s: This recipe works well, since my 'cake mold' is bigger, I had re-calculate the measurement to cater for bigger mold. The small disposable mold seriously not enough for my 'chiffon cake fans' 's kids   ^_^'


Ingredients:

Instructions:
  1. Get ready for the pandan juice (i am using the ready drops from asian groceries)
  2. Mix the Egg yolk batter
    • Separate 3 egg yolks and whites
    • Add Caster Sugar ( 1 1/2 tbsp) and mix
    • Add Oil (coconut or etc) 20 ml
    • Add coconut milk 50 ml (~3 tbsp)
    • Add pandan juice 30 ml and mix all
    • Shift 5 tablespoon of cake flour
  3. Egg white batter
    • Electric mixer -> egg white
    • Add cream of tartar 1/8 teaspoon
    • Add caster sugar 5,1/2 tbsp and mix until stiff peaks
  4. Mix some of the Egg white batter into yolk batter
  5. Mix all the yolk batter into the egg white batter
  6. Quick mix and put into oven to bake 150 celcious for 45-50 (bigger portion will be 1 hr)
============================================================
Bigger version

https://mykitchen101en.com/pandan-sponge-cake/

Ingredients:
-  4 egg yolks (grade A/size: L, room temperature)
-  60 g (1/4 cup + 2 tsps) fine sugar
-  50 g (1/4 cup) corn oil (or other vegetable oil)
-  60 ml (1/4 cup) pandan juice*
-  120 g (1 1/4 cups) low protein flour (cake flour)
-  1 tsp baking powder

Ingredients for meringue:
- 4 egg whites (grade A/size: L, room temperature)
- 1/4 tsp cream of tartar
- 60 g (1/4 cup + 2 tsps) fine sugar

Directions:
1 Grease and line 9-inch (23-cm) round baking pan with parchment paper.

Saturday, July 25, 2020

Mee Rebus

Friend sent me this recipe.. just wanna keep it first, This is my favourite noodle back in my hometown.. I will try 1 day to cook this...

This recipe will make a big pot, you can just do 1/2 of the ingredients. Adding some peanut into the soup will make it more tastier too.

MEE REBUS
汤头:
橙色番薯 4-5个
马铃薯 6个
番茄 2-3粒
江鱼仔高汤 3公升

调味:
Maggie 番茄酱 6大匙
Maggie 辣椒酱 6大匙
糖 2 大匙 (我用冰糖)
盐 1 茶匙
BEBAS 辣椒粉 (agar-agar个人喜欢的份量。主要让汤颜色更好看和有点辣味)

做法:
1) 把江鱼放入水里熬煮至出味。
2) 番薯和马铃薯去皮,切块与番茄放入江鱼仔汤里继续煮至软。
3) 取出番薯,马铃薯和番茄,用搅拌机捣烂成泥,捞出江鱼仔,把烂成泥的材料倒回汤里拌均继续煮,加入调味料,试味

Sunday, July 12, 2020

Pizza base - quick w/o yeast version

COVID-19 Stay at home... Trying to make food with whatever we have... try to reduce the no. of time going out for groceries.. Here found 1 recipe from my friends fb post.

I need to x 2 the ingredient as need to make 2 pizzas to feed the hungry kids :)


DRY INGREDIENTS:
1 1/3 cups bread flour ( x 2 = 2  2/3 cups)
2 tsp baking powder (x2 = 4 tsp)
3/4 tsp salt (x2 = 1  1/2 tsp)
3/4 tsp sugar (x2 1  1/2 tsp)

WET INGREDIENTS:
2 tsp olive oil (x2 = 4 tsp)
1/2 cup water (cold tap water x 2 = 1 cup)

OTHER
1 tbsp Extra Flour , for dusting
2 tsp vegetable oil (optional) , for brushing crust (or canola or other neutral oil) (Note 3)

Instructions
- Preheat oven to 250°C / 480°F (230°C fan) (Note 4.) Place shelf in the top quarter of the oven.
- Spray pizza pan or baking tray lightly with oil.
- Prepare pizza sauce and toppings. Keep shredded mozzarella in the fridge (Note 5).

Bread Machine
Just put all in and set for Dough function

ROLLING OUT DOUGH:
  1. Dough should be soft and elastic, and not stick to your hands. It will not be completely smooth like yeast dough (video 38 sec)(Note 6).
  2. Shape dough into a ball. Roll out into a 30cm/12" round.
  3. Transfer to pizza pan, preferably with holes (for crispier base), or a baking tray (Note 7 pizza stone). Use your fingers to pull from the centre to fill the pan to the edge - avoid pinching the edges (to ensure puffy crust!).
TOP & BAKE:
  1. Top with 1/4 cup pizza sauce and toppings of choice.
  2. Brush the crust edge (just exposed edge with no toppings on it) with oil.
  3. Bake 12 minutes, until the edges are crispy and golden. Cut and serve immediately!

Sunday, July 5, 2020

Mang Zhang Kueh 曼煎糕

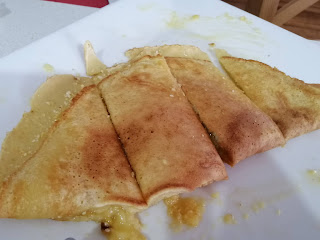
又一个我们‘巴刹‘的食物。。早餐。。点心。。什么时候都可以吃。。嘻嘻。。通常都会在’早市‘ 里找到。。

这边天气冷,很难发。。第一次做效果没那么好。。但孩子们(除了老三)都一上碟就吃完了。。说明还是不错。。快快把食谱写下。。


Youtube reference:
https://www.youtube.com/watch?v=tADmevpjW2Y&list=PLoG7DKzmawqDZh07Rec5kfk3GuTcjBOPv&index=2&t=0s

曼煎糕
材料:
220克面粉 (1.5 cup + 3 tbsp Flour)
1/2茶匙苏打粉 (1/2 tsp Baking powder)
50克糖 (4 tbsp Sugar)
3/4茶匙干酵母 (3/4 tsp yeast)
2粒鸡蛋 (2 eggs)
310毫升水 (310 ml water)

馅料:
120克花生,烤好,去皮及搅碎。(I used ready made peanut powder - not that tasty)
一些幼砂糖
一些cream style 罐头玉米/玉蜀黍
一些牛油

做法:
1. 把面粉过筛入一个大碗 。
2.加入酵母,糖和苏打粉拌均,
3.加入水和鸡蛋,搅拌至所有材料充分混合。用保鲜纸包着让混合物休息30分钟。面糊会在烹煮之前出现一些小泡沫。
4.热平底锅。搽上一层薄薄的牛油(这个步骤只需要做一次)。倒入适量面糊,把表面涂抹平均厚度。盖上锅盖 大约五分钟。当表面出先小洞,表示就快熟透了。这时候可以放入馅料,折半切块,可以上桌了!