Showing posts with label kuih. Show all posts

Sunday, July 17, 2022

CHAI KUEY 菜粿

I am refering to this youtube https://www.youtube.com/watch?v=vn4CQC7hxRc

Chai Kuey, a vege dumpling, it's not actually vegetarian as it consists of dried shrimp. Yummy warm snacks, dip with some chilli sauce, have a big bite, full of satisfaction :)

Even though you can get in Melbourne, but not easily can find too.. Also every store might have their own version that might not suit your 'hometown taste' :p The best is work it out yourself to your own likings. 

Here's the recipe I found and tried that suit me the best. The most important is the dough, for the filling.. well.. we normally 'agar agar' (means just a bit here and there without exact measurement) :)  

 Total: 18 piece Ingredients for skin dough (approximately: 460g, divide into 18 portions, each 25g)
120g wheat starch 澄粉
80g tapioca starch 木薯粉
½ tsp salt
250ml boiling water
30g cooking oil

 Ingredients for fillings (Yields: 380g)
225g Bang Guang (1 medium size)
 1 carrot 25g dried shrimp (chopped)
3tbsp cooking oil
1½ tsp sugar
½ tsp salt
1/3 tsp pepper
150ml water

Sunday, July 5, 2020

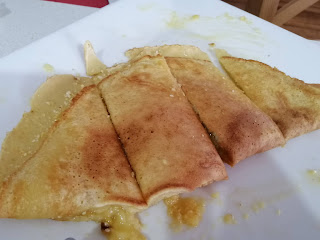
Mang Zhang Kueh 曼煎糕

又一个我们‘巴刹‘的食物。。早餐。。点心。。什么时候都可以吃。。嘻嘻。。通常都会在’早市‘ 里找到。。

这边天气冷,很难发。。第一次做效果没那么好。。但孩子们(除了老三)都一上碟就吃完了。。说明还是不错。。快快把食谱写下。。


Youtube reference:
https://www.youtube.com/watch?v=tADmevpjW2Y&list=PLoG7DKzmawqDZh07Rec5kfk3GuTcjBOPv&index=2&t=0s

曼煎糕
材料:
220克面粉 (1.5 cup + 3 tbsp Flour)
1/2茶匙苏打粉 (1/2 tsp Baking powder)
50克糖 (4 tbsp Sugar)
3/4茶匙干酵母 (3/4 tsp yeast)
2粒鸡蛋 (2 eggs)
310毫升水 (310 ml water)

馅料:
120克花生,烤好,去皮及搅碎。(I used ready made peanut powder - not that tasty)
一些幼砂糖
一些cream style 罐头玉米/玉蜀黍
一些牛油

做法:
1. 把面粉过筛入一个大碗 。
2.加入酵母,糖和苏打粉拌均,
3.加入水和鸡蛋,搅拌至所有材料充分混合。用保鲜纸包着让混合物休息30分钟。面糊会在烹煮之前出现一些小泡沫。
4.热平底锅。搽上一层薄薄的牛油(这个步骤只需要做一次)。倒入适量面糊,把表面涂抹平均厚度。盖上锅盖 大约五分钟。当表面出先小洞,表示就快熟透了。这时候可以放入馅料,折半切块,可以上桌了!

Wednesday, April 20, 2016

椰香番薯发糕(无发粉)

Recipe from FB Ong Sok Hwee

材料A:
面粉、温水(以不烫手为准)各3汤匙
酵母粉1.5茶匙
白糖1茶匙
材料B:
橙色番薯150g去皮切片蒸熟
黑糖150g
浓椰浆150ml
鸡蛋1个
盐1/2茶匙
材料C:
面粉200g
作法:
1)混合材料A搅匀静置10分钟(发酵)
2)将 1)、材料 B放入搅拌机中搅烂搅匀,倒入材料C中搅匀加盖静置1小
3)将面糊倒入铺了烘焙纸的5.5寸蒸盘(倒满),用根牙签粘油在糕面上划十字,水滚放入大火蒸30分钟至熟(用竹签插入糕体拔出没粘糕糊即熟了)盖回蒸锅盖留个小缝隙(用只筷子顶住锅盖)让发糕慢慢降温糕体才不会塌,约10 分钟才取出即可

Tuesday, December 9, 2014

Kueh Lapis / 九层糕

Its been sometime no blog about food.. as really no time to go for it..
today try my 1st attempt of "9 layer cake".. Its a traditional street-food/breakfast in Malaysia. We love to tear it layer by layer to eat ...before I forgot, just do a quick blog to note it down.


Ingredients:
400ml water
80g caster sugar (6 tbsp)

5 pandan leaves, knotted
400ml coconut milk (coconut cream from supermarket)

180g rice flour 
粘米粉 (23.04 tablespoon = 1.44 cup)
120g tapioca flour 木薯淀粉(15.36 tablespoon = 0.97 cup)

Red food colouring
Lime yellow food colouring

Method
  1. Boil water, sugar, pandan leaves and coconut milk until sugar dissolved. Discard pandan leaves and set aside to cool completely.
  2. Add in rice flour and tapioca flour, stir to mix well. Strain the batter.
  3. Grease a 7" steam pan with a little oil. Place the pan in a steamer and steam until hot. 
  4. Divide batter into 2 portions, around 126g for each layer, 4 layer with plain batter (original white) and 5 layers of red batter (add red food colouring into plain batter to become red layer).
  5. Pour 1st layer with red batter into steam pan, and steam for 3mins over medium high heat.
  6. Pour 2nd layer with white batter into steam pan, and steam for 3mins.
  7. Repeat until all 8 layers set. Add a drop of lime yellow food colouring to let red batter to become dark orange batter (i didn't do this step, just leave it as it isand steam for 15mins. 
  8. Leave the kueh to cool completely (take about 6 hours) at room temperature before cutting (use a plastic knife to cut).

Source http://nasilemaklover.blogspot.com.au/2012/04/kueh-lapis-steamed-9-layers-cake.html

Thursday, August 8, 2013

客家喜粄

My son favorite : Do not understand why he loves this so much, only taste sweet and sticky (a little bit).. well, since i hardly can get it from here... found this recipe shared by my friend in fb, quickly paste it down and will do it later.. ingredients are easy to get, but seems like need to take long time to make it.. 

When i show the pix to my son, he already said 'YUMS" and asked when can he have it... Wells... let see how it goes :) 

客家喜粄-食谱 (可做8块)

(A)面种材料:
即溶干酵母-½ tsp
清水-70g
普通面粉-83g

(B) 主面团材料:
面种-全部
砂糖-85g
清水-100g
粉红色素-数滴
糯米粉-83g
普通面粉-83g

(C) 香蕉叶-剪成8小片,铺糕底用(叶面预先抹上一层的食油)

(D)  适量的食油-抹手和抹胶刮刀用的

面种做法:

1)把面种所有的材料(A)混合一起,覆盖,放置(待发)一个晚上,(我置放了12个小时)。

主面团做法:

1)把已发好的面种和砂糖混合一起,备用;

2)清水加入适量的粉红色素,拌均匀。加进面种混合物,稍搅拌;之后把糯粉和面粉也一起加进去,混合成一个软团。

(尽量不要把面团过渡搅拌,避免面团起筋)。把面团放进一个大碗里,覆盖,待发4个小时。

3)预先把双手和胶刮刀抹上油。把面团取出,分割成8等份。轻手把小面团搓圆,摆放在已抹油的香蕉叶上。用胶刮刀在
小面团上旋转式的轻压扁。(用胶刮刀比用手容易操作的多了,整形上比起用手也来的漂亮的多了)

4)整形完毕后,待发15分钟。

5)水烧滚后,放入糕团,以中火蒸15分钟即可。

注:1)面团会很粘手,所以取出面团和整形时,全程应以油操作。


Source :  FB : cutiebun

=============================================
Another version with sweet potato
Source: FB LB Ho

番薯喜粄

材料A:
面粉100g
酵母 1/2汤匙
水 100ml
做法:
全部材料混合,发酵 1小时。

材料B:
面粉 200g
糯米粉 200g
水 300ml
糖 100-150g
蒸熟番薯 200g
油 3汤匙
做法:
1.将番薯与水和糖一起放进搅拌机里搅拌成番薯糊。
2.把发酵好的材料A,加入粉料里。
3.再加入番薯糊,混合后加入油,搅拌成一面团。
4.手上沾些油,把面团分成50g小粒(可做24粒),搓圆,放在香蕉叶上。
5.再待发酵至双倍大,以大火蒸15分钟即可。

Wednesday, May 1, 2013

Kuih Bakar

奶香马来烧糕 Kuih Bakar是马来传统糕点。华人叫它做马来烧糕,但是不知道什么原因,有些马来人却称这种糕为Kuih Bakar Bahulu Kemboja,柬埔寨烧糕。这种糕在斋戒月的马来小摊市最常见,是马来人节日招待客人不可少的糕点。其实这种糕点的口味有很多种,兰香烧糕,玉蜀黍烧糕,木薯烧糕番薯烧糕等等等。。。不过青色的香兰叶口味的烧糕还是最普遍见到的一种。

(欢迎喜欢烹饪和烘焙的朋友把他们的成品pose上来分享。只要把照片传上来,加上简单食谱说明,版主就会做成合成图pose 出来和大家分享。)

Hoe Lai Kien这次和大家分享的是奶香马来烧糕

材料A:
200 ML  清水
240 GM 白糖

材料B:
200 ML  清水+ 班蓝叶汁
210 GM 特幼面粉
两大汤匙 绿豆澄粉
1/2 TSP 盐
50 GM 融化牛油
少许青色素 + 班蓝香精

材料C:
3 粒 蛋
250 ML 浓椰浆

材料D:
芝麻装饰

做法 :-
1. 把材料A煮滚。待用。

2. 把材料B拌均。待用。

3. 将材料A趁热倒入拌均好的材料B里拌均,再加入材料C,搅拌均匀,隔渣。

4. 用牛油抹模,倒入面糊,洒上一些芝麻装饰,放入烤炉用180C , 烤30分钟左右至熟,

待冷脱模。

温馨提示:-
1. 这糕一定要烤到边有一点焦焦才好吃,同时也不可用太高温烤因为会发涨,冷了时候会塔下来,就不美观和粗糙了。

Saturday, April 27, 2013

蕃薯发糕


马拉糕

I quite like this ... finally i found the recipe, but still do not have time to make it... i have no doubts that my kids will love it.. :)

Finally i got time to make it... mm..more than few times now... i am using brown sugar, which make it really yums.. with the brown sugar aroma ........


5 eggs (do not know the size i used whatever egg that i bought)
1 1/2 cups self-raising flour
1 cup brown/white sugar (I used raw sugar cox i do not have brown sugar)
3/4 cup milk
3/4 cup vege oil
1tsp baking powder
1tsp vanilla essence

Mix all ingredients together and steam for 50 minutes - this is for gas.
* If used electric steamer i think i steam for 20- 30 minutes

Monday, April 15, 2013

鸡蛋糕

I made this last week as our sunday breakkie.. my kids love it... This is a surprise when i browse through my favorite christine's blog last week.. found the ingredients are really quite simple... do not need much complicated skills ...

I not really like 'kuih' during my childhood, now i getting more 'addicted' in making those 'kuih' as seeing my kids so enjoy having it... :)

Original recipe using the tradition chinese bamboo steam container, well, you can use anything you have in the kitchen..


預備一個 10吋的蒸籠(或 8吋已掃油的糕盤)

材料:
  • 雞蛋 5隻
  • 幼砂糖 150克
  • 低筋粉 150克
  • 雲呢拿香油(vanilla extract)數滴
  • 鹽 1/8茶匙

做法:
  1. 預備一大深盤,放在另一小鍋暖水上面。盤底不要接觸水。逐隻雞蛋打入深盤內,糖分多次逐少加入。用電動搞拌器完全拌勻後,才加入另一隻雞蛋和另些糖。盤不要受熱過度,只需暖暖就可以。否則令雞蛋煮熟,就不好了。如是者,把所有雞蛋和糖用高速充分搞打拌勻,約 5至 7分鐘,直至體積膨脹,顏色發白。用搞拌器提起少許麵糊,要約等三秒才滴下一滴來。
  2. 加入雲呢拿香油。把鹽拌入低筋粉,分三至四次篩入,輕手拌勻。
  3. 鋪紙(baking paper)在蒸籠中。把麵糊倒進蒸籠中,用大火隔水蒸約 30分鐘。用竹籤或針插入蛋糕,沒麵糊黏著,即是熟透。即成。趁熱享受。

更多内容: http://www.christinesrecipes.com/2010/07/steamed-cake.html#ixzz2QUgmfLOP

Monday, March 25, 2013

番薯流心糯米糍

I did not know this 'kuih' is made from sweet potato until i found the recipe :p what a shame ya... In Malaysia, we are very easy to get all the types of kuih/dessert around the corner ... on the way to work, on the streets.. we never ever need to know how to do it.. it's too convenience to get from everyone and is not expensive... Well, another way to 'trick' my kids to had healthy food (sweet potato) :)

分量: 10 至 12 個


*
椰糖:具獨特的糖香味。唐人鋪有售。


材料:

  • 紅番薯 200克
  • 糯米粉 100克
  • 椰糖 10至 12粒(每粒約手指尖大小)
  • 椰絲 酌量


做法:

  1. 把番薯用中大火,隔水蒸煮及軟稔。用筷子可容易穿過,即熟透。切半,用匙羹刮出番薯泥,放入大盤中。待涼至暖而不燙手。
  2. 把糯米粉加入番薯泥中,拌勻搓成麵團。如覺得麵團太乾可逐步加少許水。相反太濕的話,可酌量加少許糯米粉。
  3. 把麵團分成 10至 12等份。把每等份包一份椰糖在中央,用手搓成小圓球。重複此步驟,把所有其餘麵團做成小丸子。
  4. 煮一大鍋沸水,小心地把丸子放入沸水中。如鍋子不夠大,分批煮。即刻用筷子或湯匙搞拌水,以免丸子黏底。用大中火,煮至丸子浮上水面,再繼續煮多五分鐘。撈起丸子在一略掃了油的碟上面。切勿讓丸子重疊。
  5. 逐粒丸子放入椰絲中,均勻黏上椰絲。即成。


溫馨提示:

  • 因應各個番薯含水量不同,搓麵團時,感覺太乾可酌量加水(可用蒸番薯時,在碟中的水)。或感到太濕,可加粉。無論要加水或粉,都要逐少加。
  • 如糯米糍吃不完,可放入密封盒子中。為免有倒汗水弄濕糯米糍,可放一張廚房紙在糯米糍上面,才加蓋。放入雪櫃中,可冷藏存放三幾天。當要食的時候,可放回室溫中一小時回軟。
  • 如買不到椰糖,可用片糖代替。
  • 縮短煮番薯時間:可先把番薯去皮,切粒後才蒸。然後用匙羹壓成蓉。


Sunday, March 10, 2013

缽仔糕

The recipe i got is from HongKong style.. malaysia style a bit different.. but still is our favorite night market 'snack' .. :)

I would like to try this ... as here is not easy to get 'malaysia street kuih' ..

Hongkong style with 'red bean' in the middle, while this is the way i like to eat.. dip with the desiccated coconut.. I bought the ready-pack from Coles... while in my hometown, we use fresh coconut... is super yums...!!


材料:

粘米粉 85克
澄麵 55克
黃糖 110克
水 2杯
紅豆 (先煮至軟身,或用現成的罐頭紅豆)少許

做法:
  1. 先用 1/2杯水把粘米粉和澄麵混合成粉漿。
  2. 用 1 1/2杯水煮溶黃糖。把煮滾的糖水倒入粉漿中,快手拌勻,切勿有粉粒或沉底。
  3. 分批倒糖水粉漿入模內,隔水蒸10分鐘。可於入鍋前,或中途加入紅豆在糕面上。如果用飯碗,則蒸20分鐘。


更多内容: http://www.christinesrecipes.com/2008/07/steamed-rice-cup-cake-with-red-bean.html#ixzz2N7jkuoZv

Wednesday, February 20, 2013

Kuih Baicar Roti

This is something like bread pudding. The best thing is we can make this with the balance of the bread that going to 'expire' .. which we not able to finish it on time, we can transfer it to something tasty :)

½ loaf bread / 6-8 slices of bread
1 ½ cup plain flour
1 cup sugar
4 eggs
5 pcs pandan leaves + 1 cup water
2 tbsp vegetable oil
2 cups coconut milk ( 400 g cocunut milk + 1 cup of water)
½ tsp salt
Pandan paste, green clouring, sesame seeds

1. Blend the pandan leaves with 1 cup of water, strain and put aside (get 1 cup of pandan juice)
2. In a bowl mixed the bread with the coconut milk. Set aside to be soften.
3. Mix the plain flour, sugar, eggs, salt and oil in a bowl.
4. Blend in the bread and coconut milk in the blender till creamy. Add the flour mixture in the blender and mix well. Add the pandan paste and green coloring.
5. Pour batter in a greased baking and sprinkle some sesame seeds on top.
6. Bake in a pre heated oven 170c for 45-50 mins. Once baked put aside to cool.

NOTE: Greased the baking with some oil and heat in over for 5 mins before pouring the batter to prevent from sticking.

Thursday, February 7, 2013

木薯糕


1 tablespoon  extra butter for brushing tray
1                     banana leaf for lining trayh

650g               tapioca, peeled and grated
200ml             thick coconut milk
¼ teaspoon    saltj
6 tablespoon   sugar
1                      egg
1 tablespoon    tapioca flour
1 tablespoon    butter
  1. 1. Greasue 8x8 square tray with butter and line with banana leaf
  2. Combine all ingredient in mixing bowl and blend with hand whisk. Pour into tray.
  3. Bake in preheatjed oven at 180 for 30-40 min until cake is set. Turn up the heat to grill the kuih at 250 for 5-10 min, until crust is brownd and aromatic.
  4. Remove from the oven andl leave to cool for at least 6 hours or overnite,before cutting into 2 cm-thick squares.
==============================
材料
2 lbs 的木薯蓉 (Shredded Cassava /Tapioca) 
200gm 椰糖 (palm sugar) 
1/2 杯 浓椰浆/奶 (thick coconut milk) 
3/4 杯水 
2只蛋 
2 tsps 黄油(butter) 
1/4 tsp 盐 
2-3 滴的香兰精 (screwpine extract) 
1.5 tbsp 面粉 (all purpose flour) 
1.5 tbsp 木薯粉/或者 corn starch

做法
首先解冻木薯蓉和椰浆(我用的是冷冻椰浆),然后在一口锅子里倒入3/4的水,加入200gms的椰糖,煮溶冷却
备用。 
然后把木薯蓉,椰奶,面粉,木薯粉,盐,香兰精混合,然后倒入刚刚煮好的椰糖水,鸡蛋拌匀。记得不要下牛油。 
预热烤箱至 360 F (大约175 C)。 
入烤箱烤一个小时。 
一个小时后,把木薯糕取出,表面刷上黄油,然后把烤箱转为 Broil,再入烤箱烤成金黄色 (大约八-十分钟)就可以了。 
稍微等冷却,然后切块。喜欢吃椰丝的可以在吃的时候撒上一点椰丝。

马来糕


5 eggs (do not know the size i used whatever egg that i bought)
1 1/2 cups self-raising flour
1 cup brown/white sugar (I used raw sugar cox i do not have brown sugar)
3/4 cup milk
3/4 cup vege oil
1tsp baking powder
1tsp vanilla essence

Mix all ingredients together and steam for 50 minutes - this is for gas.
* I used electric steamer i think i steam for 20- 30 minutes 
Recipe from a friend